
With the latest update of KMPlayer, most of us would be finding it difficult to use. To make your work easier, here are some tips to help you to know about “How to add an external codec in KMPlayer”. Follow the given process below:
First of all, you need to download a codec you would like to use. We recommend “AC3 Filter Full” codec.You can visit here to download the latest version: http://www.ac3filter.net/
or Direct download link is : http://www.ac3filter.net/wiki/Download_AC3Filter
After installing “AC3 Filter Full” codec, go to “Preferences (F2)” in KMPlayer and follow these steps :
Click “Filter Control”-> “Decoder Usage” ->“Internal Audio Decoder”-> check “All Disable”. -> hit “Close”

3. Restart KMPlayer and now you can enjoy your video.
– Custom-
KMPlayer Audio Codec– External Audio Codec usage (AC3, E-AC3, DTS)
1. Use LAVAudio.ax
Thankfully, KMPlayer uses “LAVAudio.ax” file as an internal codec. This is NOT allowed to use ONLY with AC3 & DTS; however, you can use it if you add it as an external codec.
Let’s take a look at how to add an external audio codec in KMPlayer.
1) Preferences (F2) à Filter control à Decoder Usage à Internal Audio Decoder
Check “ALL Disable”
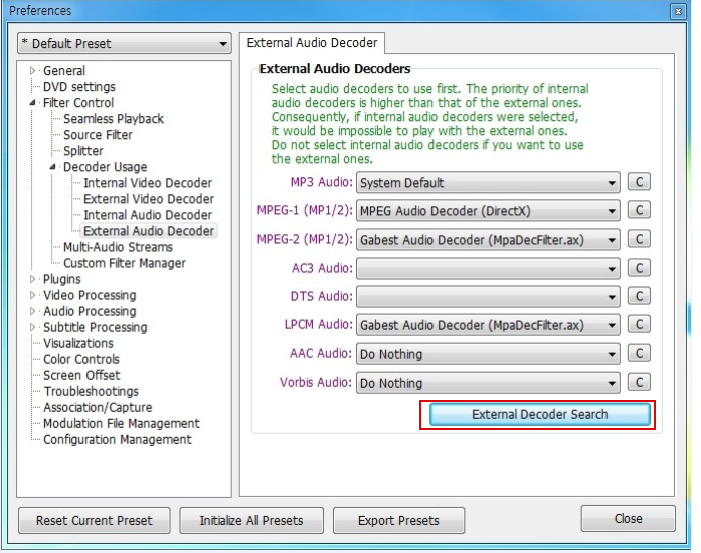
2) Preferences (F2) à Filter control à Decoder Usage à External Audio Decoder
– Click “External Decoder Search”
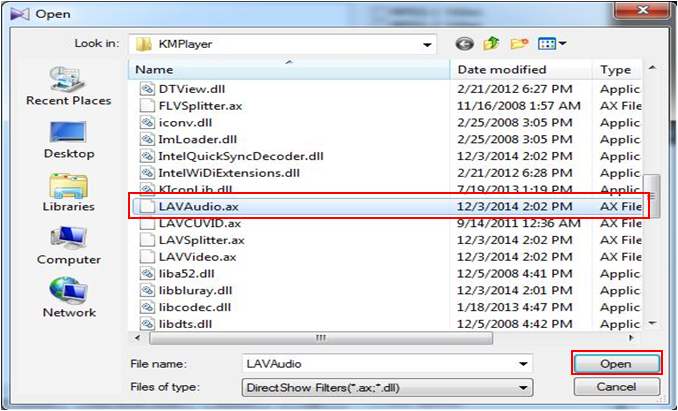
3) When External Decoder/Filter Management pops up, click “Add External Codec”.

4) Open KMPlayer folder where KMPlayer has been installed on your computer and select “LAVAudio.ax” and click “Open“.
Then, it will be registered as below.
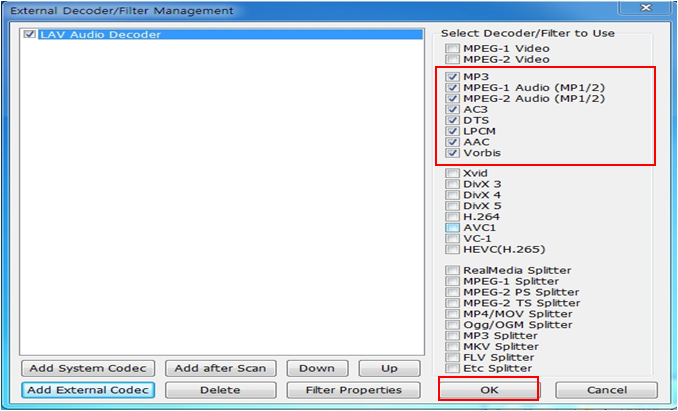
Now, come back to “External Audio Decoder” tab again and click each Audio Codec section in Combo Box as the picture below. You will find “LAV Audio Decoder” is added as “*LAV Audio Decoder”.
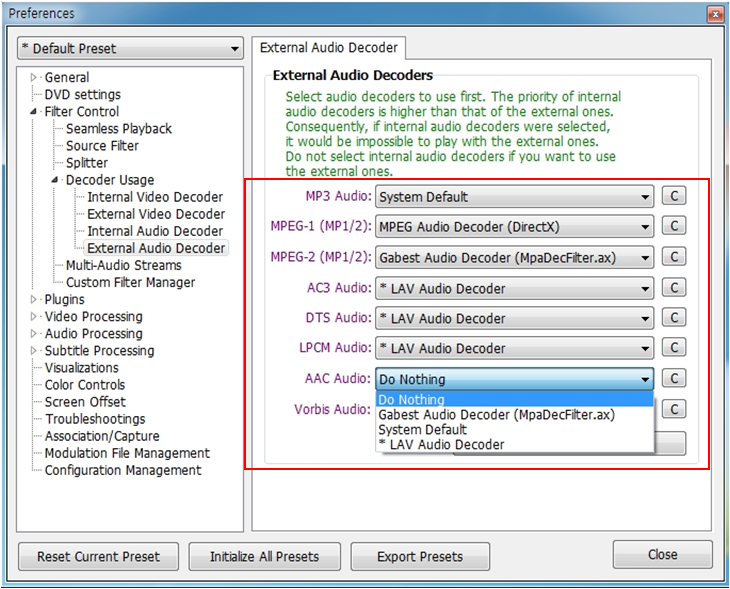
You can adjust the detail settings of each audio codec by clicking “C” button.
After making the adjustment, click “Close” button and restart KMPlayer to enjoy your video.
Hope the above information might help you.
